Minute Soft Pretzels: Master the Golden Chew with a Baking Soda Bath
There’s an undeniable magic to homemade soft pretzels. Forget the busy weeknight scramble; envision your kitchen filling with the inviting aroma of freshly baked goods, a scent that promises warmth, comfort, and a touch of nostalgic delight. Far from being a complicated culinary feat, crafting these golden, chewy treats at home is surprisingly accessible, transforming simple pantry staples into a show-stopping snack board centerpiece or a cozy family meal. This guide will walk you through
how to make soft pretzels that achieve that coveted golden crust and irresistible chew, all thanks to one crucial, simple step: the baking soda bath.
The Science Behind the Golden Chew: Why a Baking Soda Bath is Essential
The secret to a soft pretzel's distinctive dark brown crust and uniquely chewy interior lies in its pre-bake dip. While traditional German pretzels often use a lye bath (sodium hydroxide) for an intensely dark, crisp exterior, this ingredient is caustic and not suitable for home use. The good news? A baking soda bath offers a safe, accessible, and equally effective alternative for your homemade creations.
When baking soda (sodium bicarbonate) is dissolved in boiling water, it creates an alkaline solution. Dipping your shaped pretzel dough into this bath for even a short period (10-30 seconds) significantly raises the pH of the dough's surface. This increased alkalinity accelerates the Maillard reaction during baking – the chemical process responsible for browning and developing complex, savory flavors in many foods. It’s what gives pretzels their signature deep golden-brown color, a subtly unique flavor, and contributes significantly to that characteristic chewy texture without making them tough. This quick step is truly a game-changer, elevating your pretzels from mere bread to authentic, bakery-style delights.
Gather Your Arsenal: Simple Ingredients for Supreme Pretzels
One of the most rewarding aspects of mastering
how to make soft pretzels is realizing how few, humble ingredients you need. Most are likely already in your pantry!
*
All-Purpose Flour: The backbone of your dough. For a slightly more wholesome, fiber-rich twist, you can swap in part whole wheat flour, as suggested in our related article,
Homemade Soft Pretzels: Easy Steps for Cozy Weeknight Comfort.
*
Active Dry Yeast: The leavening agent that gives your pretzels their light, airy interior.
*
Granulated Sugar: Not just for sweetness, sugar feeds the yeast, helping it activate and making your dough rise beautifully.
*
Warm Water: Crucial for activating the yeast. Aim for a temperature between 105-115°F (40-46°C) – warm to the touch, but not hot.
*
Melted Butter: Adds richness, flavor, and helps achieve that tender crumb.
*
Salt: Enhances flavor in the dough itself, balancing the slight sweetness.
*
Baking Soda: The star of the pre-bake bath, essential for color and chew.
*
Coarse Pretzel Salt (optional, but highly recommended): For that classic finish.
Step-by-Step to Pretzel Perfection: Crafting Your Golden Chew
Embarking on the journey of
how to make soft pretzels is a delightful process, broken down into manageable, satisfying steps.
The Dough's Humble Beginnings: Activating Yeast & Forming
Your pretzel journey begins with awakening the yeast. In a large bowl, whisk together the warm water, sugar, and yeast. Let this mixture sit for about a minute. This "tiny pause" allows the yeast to bloom, confirming its activity and setting the stage for a light, comforting dough. Next, whisk in the melted butter and salt. Gradually add about 3 cups of flour, mixing until just combined. Continue adding more flour, a little at a time, until the dough pulls away from the sides of the bowl. It should be slightly tacky but not sticky, feeling soft and pillowy rather than dry – this ensures your pretzels will be tender, not heavy.
Turn the dough out onto a lightly floured surface and knead for 3–5 minutes. You're looking for a smooth, elastic consistency. If it feels too sticky, sprinkle just a touch more flour, enough to keep it workable without making it stiff. Form the dough into a ball, cover it, and let it rest for a short 10-30 minutes. This quick rest makes this recipe particularly weeknight-friendly, allowing you to enjoy fresh pretzels even on busy evenings.
Shaping the Iconic Twist: More Than Just a Pretzel
While the dough rests, preheat your oven to 400°F (204°C). Line two baking sheets with silicone baking mats – these are highly recommended for even browning and easy removal, contributing to that golden, comforting finish.
Once rested, cut the dough into roughly 75g portions. Roll each piece into a long rope, about 20–22 inches. The key here is even thickness to ensure even baking. To form the classic pretzel shape:
1. Form a U-shape with the rope.
2. Twist the ends twice.
3. Bring the twisted ends down towards the bottom of the U and press firmly to secure them.
There’s something truly grounding about shaping dough by hand – it transforms baking into a fun family activity, as detailed in our guide,
Soft & Chewy Homemade Pretzels: Perfect for Family Meals & Meal Prep.
The Golden Dip: Your Baking Soda Bath Ritual
Now for the crucial step that defines your pretzel's character! In a large pot, bring 8-10 cups of water and 1/2 cup of baking soda to a rolling boil. Carefully drop each shaped pretzel into the boiling bath, one or two at a time, for 20-30 seconds. Do not overcrowd the pot. Using a slotted spoon or spider, transfer the pretzels directly to your prepared baking sheets, allowing excess water to drip off. This quick bath locks in that deep golden crust and chewy texture. A fantastic time-saving tip: you can even refrigerate the shaped pretzels on their baking sheets for up to 24 hours before baking, making this a flexible option for meal prep.
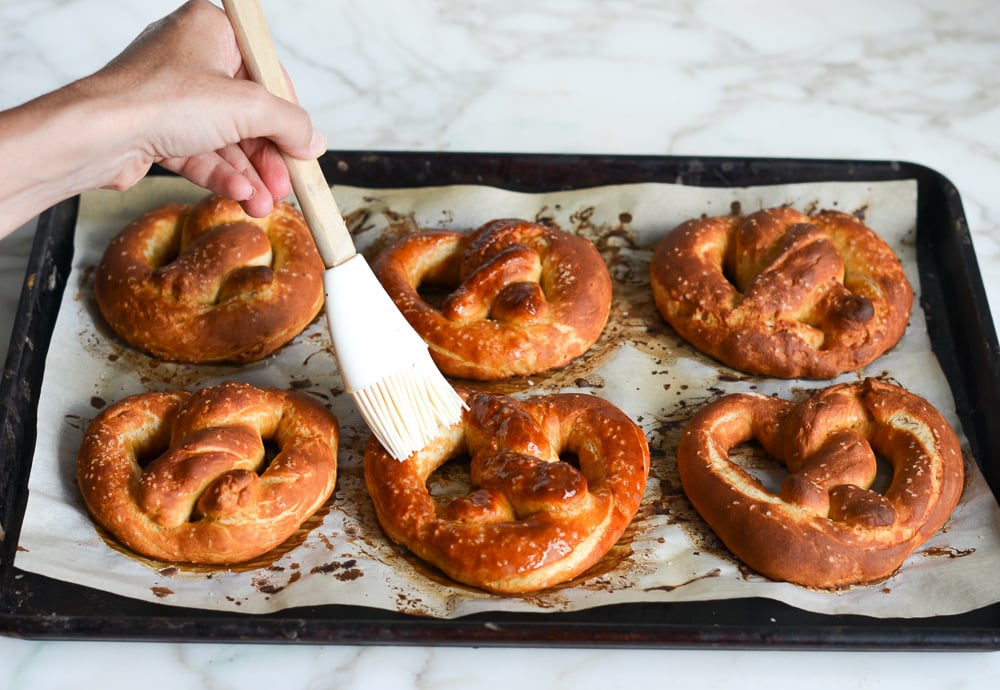
The Grand Finale: Baking & Browning
Once all your pretzels have had their alkaline bath and are arranged on the baking sheets, generously sprinkle them with coarse pretzel salt. Pop them into your preheated oven and bake for 12-15 minutes, or until they reach a beautiful, dark golden brown. Keep an eye on them, as oven temperatures can vary. The aroma filling your kitchen will be warm and inviting – the kind of nourishing homemade moment that has everyone wandering in asking when dinner (or snack time!) is ready.
Beyond the Basics: Tips for Your Best Pretzels Yet
*
Water Temperature for Yeast: Precision matters. Water that's too hot will kill the yeast; too cold, and it won't activate. Use a thermometer if unsure.
*
Don't Over-Flour: A common mistake is adding too much flour during kneading, leading to dry, tough pretzels. Your dough should remain soft and pliable.
*
Silicone Mats Are Your Friend: While parchment paper works, silicone baking mats provide superior non-stick properties and promote more even browning on the bottom of your pretzels.
*
Embrace Customization: Once you've mastered the classic, don't be afraid to experiment! Omit the coarse salt and sprinkle with cinnamon sugar immediately after baking for a sweet treat. Or, add shredded cheese during the last few minutes of baking for cheesy pretzels.
*
Perfecting the Rope: When rolling your dough into ropes, try to keep the thickness as consistent as possible across the entire length. Thicker sections will be doughy, thinner sections might overcook.
Serving Suggestions: Elevate Your Pretzel Experience
While a perfectly baked soft pretzel, still warm from the oven, needs little accompaniment beyond its sprinkle of coarse salt, they are incredibly versatile. Pair them with a spicy nacho cheese sauce for a classic comfort food experience. For a lighter, higher protein option, serve with a creamy Greek yogurt dip, hummus, or even a homemade honey mustard. Sweet variations are fantastic with a cream cheese frosting or a simple chocolate dip. The possibilities are endless, making homemade pretzels perfect for any occasion.
Mastering
how to make soft pretzels is a rewarding culinary adventure that brings warmth, comfort, and deliciousness into your home. With the simple magic of a baking soda bath, you can achieve that sought-after golden crust and satisfying chew that makes these treats so irresistible. So, roll up your sleeves, gather your ingredients, and get ready to enjoy the ultimate homemade soft pretzel experience – a truly comforting and special creation.