Homemade Soft Pretzels: Easy Steps for Cozy Weeknight Comfort
There's an undeniable magic to homemade soft pretzels. That warm, golden crust, the perfectly chewy interior, and the intoxicating aroma of fresh baking that fills your kitchen — it instantly transforms a regular evening into a cozy, comforting haven. While often seen as a treat from a food court or a specialty bakery, learning how to make soft pretzels at home is surprisingly straightforward, turning simple pantry staples into a delightful centerpiece for a casual dinner, a fun snack board, or a heartwarming family activity. This guide will walk you through the easy steps to achieve that bakery-quality chew and flavor, making cozy weeknight comfort a delicious reality.
Why Homemade Soft Pretzels Are a Weeknight Winner (and Weekend Delight!)
Forget complicated techniques and lengthy rising times. This recipe for homemade soft pretzels is designed for accessibility, proving that wholesome, comforting food doesn't have to be a special occasion project. The beauty lies in its simplicity: flour, yeast, water, butter, and salt come together to form a nourishing base that's both satisfying and surprisingly light. It's a balanced approach to classic comfort cooking, allowing you to enjoy a homemade treat that feels special without demanding hours of your time.
Beyond their delicious taste, these pretzels offer incredible versatility. They're perfect as a grab-and-go snack, an appetizer for a gathering, or even a creative component of a family dinner idea. Imagine a "pretzel board" with various dips for a unique meal! For those looking to add a nutritional boost, swapping a portion of all-purpose flour for whole wheat flour introduces a subtle nutty flavor and a boost of fiber, making your homemade pretzels even more wholesome. The process itself, from mixing to shaping, can be a grounding, almost meditative experience, or a fun, interactive activity for the whole family, especially on a relaxed weekend.
Mastering the Dough: From Simple Ingredients to Pillowy Perfection
The foundation of any great soft pretzel is its dough. Achieving that perfect balance of softness and elasticity is key, and it all starts with a few crucial steps.
Activating Your Yeast: The First Step to Fluffiness
The journey to fluffy, tender pretzels begins with activating your yeast. In a small bowl, combine warm water (ideally between 105-115°F or 40-46°C — too hot will kill the yeast, too cold won't activate it) with a touch of sugar and your active dry yeast. The sugar isn't just for flavor; it's food for the yeast, helping it to bloom. Let this mixture sit for just about a minute. You'll know it's working when you see a foamy layer forming on the surface. This tiny pause is critical; it ensures your yeast is alive and ready to give your dough that light, comforting texture that makes every bite feel like a cozy upgrade.
Mixing and Kneading: Finding That Perfect Balance
Once your yeast is bubbling, it's time to build the dough. Whisk in the melted butter and salt into the yeast mixture. Then, add about 3 cups of all-purpose flour. Mix until just combined, creating a shaggy dough. Now, gradually add more flour, a tablespoon at a time, mixing after each addition, until the dough is slightly tacky but pulls away cleanly from the sides of the bowl. The goal here is a soft, pillowy dough, not a dry or stiff one. Over-flouring can lead to heavy, dense pretzels, so trust your instincts — it should still feel moist to the touch.
Transfer the dough to a lightly floured surface and knead for 3-5 minutes until it's smooth and elastic. If it feels sticky during kneading, sprinkle just a tiny bit more flour, enough to keep it workable without altering the overall soft consistency. A well-kneaded dough will have a springy feel and pass the "windowpane test" — you should be able to stretch a small piece thin enough to see light through it without tearing. This balanced approach ensures your homemade pretzels are tender, possess that signature bakery-style chew, and remain lighter than traditional, denser versions.
Once kneaded, shape the dough into a ball, place it in a lightly oiled bowl, cover it with a clean kitchen towel or plastic wrap, and let it rest. Unlike some bread recipes that require long proofing times, this pretzel dough only needs 10-30 minutes. This short rest is what makes this recipe truly weeknight-friendly, allowing the gluten to relax and the dough to become easier to handle without a lengthy commitment.
The Art of Shaping and the Secret to That Iconic Golden Crust
With your dough perfectly rested, the real fun begins: shaping your pretzels and giving them their unique color and texture.
Shaping Your Pretzels: A Fun, Hands-On Activity
First, preheat your oven to 400°F (204°C) and line two baking sheets with silicone baking mats or parchment paper. Silicone mats are highly recommended for their non-stick properties and ability to promote even browning. This simple prep step helps ensure everything bakes beautifully for a golden, comforting finish.
Divide your dough into roughly equal portions, about 75g each if you want uniform pretzels. On a lightly floured surface, take each portion and roll it out into a long rope, typically 20-22 inches (50-55 cm) long. Aim for an even thickness throughout the rope. Then, form a "U" shape, cross the ends twice, and fold them down onto the bottom curve of the "U" to create that classic pretzel knot. There's something truly grounding about shaping dough by hand — it transforms baking into a delightful ritual, whether you're alone or making it a fun family dinner activity.
The Baking Soda Bath: Unlocking Chewy Texture and Golden Hue
This is arguably the most crucial step when learning how to make soft pretzels that truly stand out. The baking soda bath is the secret weapon behind their distinctive deep golden crust and wonderfully chewy texture. While it might seem unusual, it's a simple process with transformative results.
In a large pot, bring several cups of water to a rolling boil, then carefully stir in baking soda. The alkaline solution created by the baking soda is what makes all the difference. Gently drop each shaped pretzel into the boiling bath for just 20-30 seconds — no longer! Using a slotted spoon or spider, quickly transfer the bathed pretzels to your prepared baking sheets. This quick dip drastically changes the surface pH of the dough, promoting the Maillard reaction during baking. This chemical reaction is responsible for the deep golden-brown color and the development of complex, savory flavors that are characteristic of pretzels, rather than just a pale, bread-like crust. For a deeper dive into this fascinating process, check out our article on Minute Soft Pretzels: Master the Golden Chew with a Baking Soda Bath.
An excellent tip for busy schedules: you can even refrigerate your shaped, un-bathed pretzels for up to 24 hours before dipping and baking. This makes them a fantastic meal prep option for busy days, allowing you to enjoy fresh, warm pretzels with minimal effort when hunger strikes.
Baking Your Pretzels to Golden Perfection (and Beyond!)
With your pretzels shaped and bathed, they're ready for their final transformation in the oven.
Oven Prep and Baking
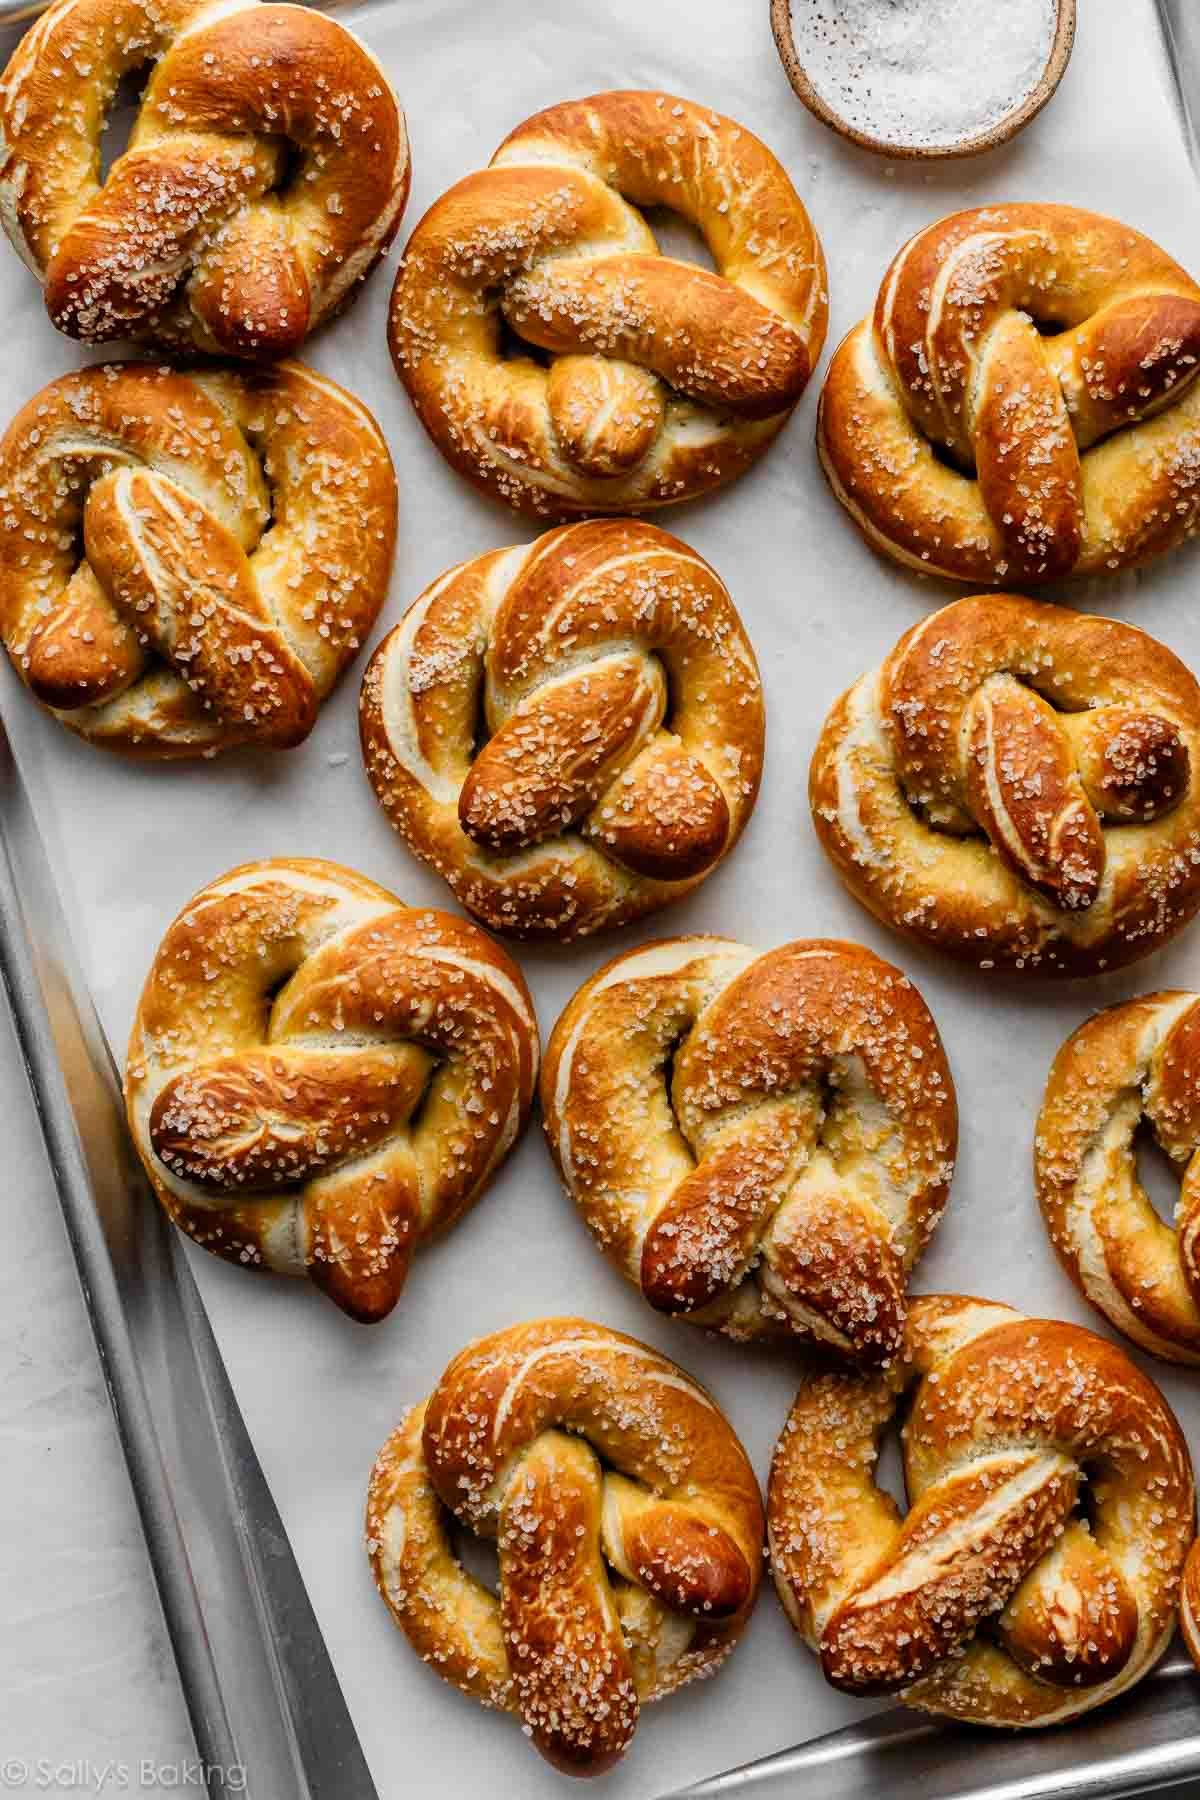
Once the pretzels are on the baking sheets after their soda bath, sprinkle them generously with coarse salt. The large crystals adhere beautifully and provide that iconic salty crunch. Then, slide them into your preheated 400°F (204°C) oven. Bake for 12-15 minutes, or until they achieve a deep, dark golden brown. Keep an eye on them, as oven temperatures can vary. As they bake, your kitchen will fill with an incredibly warm and inviting aroma — the kind of nourishing, homemade meal moment that makes everyone wander in asking when dinner is ready.
Serving Suggestions and Customization
Serve your homemade soft pretzels warm, straight from the oven, to fully appreciate their tender interior and crisp crust. While coarse salt is the classic topping, the possibilities for customization are endless.
- Savory Dips: Pair them with a spicy nacho cheese sauce, a classic grainy mustard, a creamy honey mustard, or even a high-protein Greek yogurt dip for a healthier twist.
- Sweet Delights: For a delightful dessert or sweet snack, skip the coarse salt before baking. Instead, brush the warm pretzels with melted butter and sprinkle them generously with cinnamon sugar.
- Flavor Infusions: Experiment with adding garlic powder, onion powder, or everything bagel seasoning to the dough or sprinkled on top before baking for unique savory profiles.
Remember that meal prep flexibility we mentioned? If you've refrigerated your shaped pretzels, simply take them out, give them their quick baking soda bath, salt them, and bake. This makes them perfect for spontaneous cravings or planned gatherings. For more ideas on how to incorporate these into your weekly routine, our article on Soft & Chewy Homemade Pretzels: Perfect for Family Meals & Meal Prep offers additional insights.
Conclusion
Learning how to make soft pretzels at home is more than just following a recipe; it's about embracing the joy of creating something truly comforting and delicious from scratch. From the satisfying act of kneading dough to the golden aroma that fills your home, every step is a testament to the simple pleasures of homemade food. With these easy-to-follow steps, you can confidently bake soft, chewy, and perfectly golden pretzels that will impress your family and friends, transforming any day into a cozy, comforting experience. So, gather your ingredients, roll up your sleeves, and get ready to enjoy the best homemade soft pretzels you've ever tasted!
